Stop Guessing Your Angles: How to Match Binding Rotation to the Way You Actually Ride
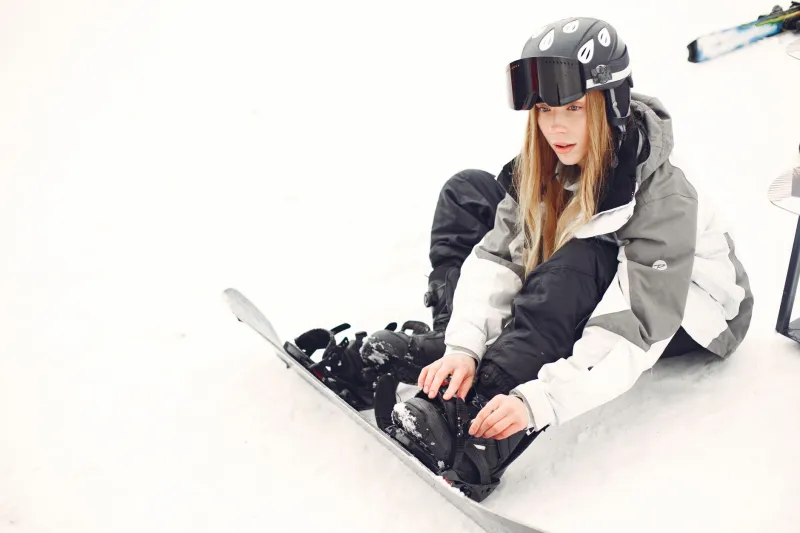
Here's a scenario that plays out at resorts all over the country every single season. A rider shows up at the mountain, drops into their first run, and spends the whole day fighting their board. Toe-side turns feel like a wrestling match. Heel-side transitions feel late and wooden. They blame the snow, the wax, maybe the board itself.
They never once look down at their bindings.
Binding angle is one of those setup variables that sounds simple on paper—rotate the binding forward, rotate it back, tighten four screws, done. But the reality is that most riders are running angles that have nothing to do with how they actually move. They're copying setups from pros with different body proportions, different riding histories, and completely different goals. Or they're riding whatever the shop threw on during their first season and never touched it since.
If your turns feel inconsistent or your edge response feels sluggish, there's a real chance your binding rotation is the culprit—and fixing it might be simpler than you think.
What Binding Angle Actually Controls
Before you start spinning discs, it helps to understand what you're actually adjusting. Binding angle determines the rotational position of your foot relative to the board's centerline. A higher positive angle points your front foot more toward the nose. A zero or negative angle on your back foot points it toward the tail.
The reason this matters is biomechanical. Your hips can only rotate so far before they hit a wall of tension. Your knees track in a specific direction based on how your femur sits in the socket. When your binding angles align with those natural movement patterns, everything flows—your weight transfers cleanly, your edges engage at the right moment, and your body stays stacked over the board. When your angles fight your anatomy, you compensate. You twist through the lower back, you bend your knees inward, you initiate turns late because your body is working around the setup instead of through it.
The Hip Orientation Test
Here's a diagnostic you can do in your living room before you ever touch a screwdriver.
Stand on a flat surface in your socks. Relax completely—shake out your legs, drop your shoulders, let everything go neutral. Now look down at your feet. Notice the natural splay. Most people's feet don't point straight ahead; they angle outward to some degree. That natural angle is a rough indicator of how your hips are oriented at rest.
Now simulate a snowboard stance. Stand with your feet roughly shoulder-width apart and try to squat down as if you're absorbing a bump. Pay attention to where your knees want to track. If they're collapsing inward, your angles might be too aggressive. If you feel tension in your hips when you try to face forward, your front binding might be too low.
This isn't a perfect science, but it gives you a baseline. Your resting hip orientation is a starting point for your front binding angle. A lot of riders with natural hip external rotation—where your feet splay noticeably outward—do better with higher front angles in the +18 to +24 range. Riders with a more neutral stance often find +15 or even lower feels more natural.
How Your Turn Style Changes the Equation
Hip orientation is only half the story. The other variable is how you actually initiate turns.
Think about where your movement starts when you carve. Do you lead with your shoulders and rotate through your upper body? Do you drive from the hips and let the board follow? Do you pressure the front foot early and use it to steer, or do you stay centered and rely on edge angle?
Riders who are upper-body-dominant—meaning they tend to rotate their shoulders into turns—often need a bit more front-foot angle to keep the hips and shoulders aligned. If your shoulders are already rotating forward and your front binding is pointing too far across the board, you create a twisting conflict at the waist that bleeds power out of every single turn.
Hip-driven riders, on the other hand, tend to stay more square to the board through turns. They're not rotating as much at the top; they're using lateral hip drive and edge tilt to create arc. These riders often find that a slightly lower front angle keeps them feeling centered and gives them more control over pressure distribution.
Neither style is better. They just need different setups.
The Back Foot Problem Nobody Talks About
Front binding angle gets most of the attention, but the back foot is where a lot of riders silently suffer.
A negative back angle—duck stance—works well for freestyle and park riding because it makes switch riding feel more symmetrical. But a lot of all-mountain and freeride riders run duck out of habit, not intention. If you spend ninety percent of your time riding in one direction and rarely hit the park, a flat or slightly positive back angle might serve you better.
Here's the test: on a mellow groomer, pay attention to your back knee during heel-side turns. If it's caving inward noticeably, your back binding might be too negative. That inward knee collapse is your body trying to compensate for an angle that's working against your turn mechanics. Over time, it's also a setup for knee strain.
Experimenting with moving your back binding from -9 to -6, or from -6 to -3, is one of the lowest-risk, highest-reward adjustments you can make. It takes five minutes and costs nothing.
Making Changes the Right Way
The trap most riders fall into when they start experimenting with angles is changing too much at once. Move one binding by three degrees, ride it for a full day on varied terrain, and pay attention to specific feedback: How does the first turn of the day feel? Are heel-side or toe-side transitions quicker? Does your back feel more or less fatigued at the end of the day?
Give each adjustment real time before you dismiss it. Your body needs a few runs to recalibrate muscle memory, especially if you've been riding the same angles for multiple seasons. What feels weird on run one might feel completely natural by run ten.
Also, keep notes. Seriously. Angle adjustments are easy to forget, and if you find a setup that works, you want to be able to replicate it on every board in your quiver.
Your Setup Should Fit You, Not the Other Way Around
The broader point here is that there's no universal right answer when it comes to binding angles. What works for a professional halfpipe rider with a decade of muscle memory built around a specific setup has essentially zero relevance to what's going to work for you on your home mountain.
The riders who progress fastest aren't always the ones with the most expensive gear or the most days on snow. They're the ones paying attention—to how their body moves, where their turns break down, and what their setup is actually doing. Dialing in your binding angles based on your real mechanics rather than someone else's template is one of the most direct ways to close the gap between how you ride now and how you want to ride.
Stop copying. Start diagnosing. Your best setup is already in there—you just have to find it.