One Board or Three? How to Build a Snowboard Quiver That Actually Makes Sense
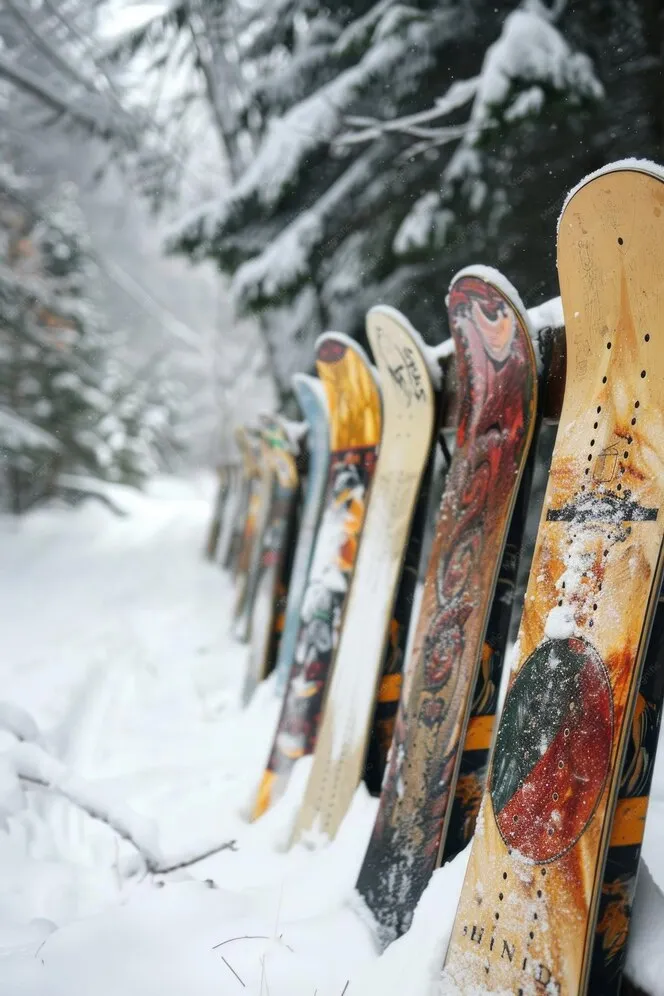
Photo: multiple snowboards lined up against snowy mountain lodge wall, via img.freepik.com
Let's be real: the idea of a full quiver is deeply appealing. A dedicated pow board for those bluebird Wasatch mornings. A stiff, precise carving setup for groomers. A playful, catch-free park deck for lapping the pipe. It sounds incredible on paper.
It also sounds like a second mortgage.
The quiver question is one of the most common — and most genuinely complicated — decisions snowboarders face. And the answer isn't the same for everyone. At Powe Snowboards, we believe riding smart means making gear decisions that actually fit your life, your terrain, and your budget. So let's break this down honestly.
First, Be Honest About How You Actually Ride
Before you spend a single dollar, you need to answer one question with brutal honesty: what does your average riding day actually look like?
Not your ideal day. Not the powder day you're fantasizing about. Your average day.
For most US riders, that means a mix of groomed runs, maybe some trees, the occasional park hit, and whatever conditions the mountain decides to serve up. If you're riding Mammoth, Park City, or Stowe on a regular basis, you're probably not spending 80% of your time in the backcountry or lapping the halfpipe. You're doing what most people do: a little bit of everything.
That rider — the vast majority of snowboarders in the US — probably doesn't need a quiver. They need one really smart board.
The Case for a Single Quiver-Killer Board
The all-mountain board exists for a reason, and modern construction has made it genuinely capable across terrain types that would have required two separate setups a decade ago. Directional twin shapes, hybrid camber profiles, and mid-flex ratings have produced boards that handle groomers with authority, float reasonably well in pow, and still respond playfully enough for casual park use.
If your riding breaks down to roughly 70% resort all-mountain, 20% park or freestyle, and 10% powder days, a quality all-mountain board in the right size and flex for your weight and style will cover you. You're not going to outperform a dedicated park board in the pipe or a dedicated pow board in chest-deep Utah snow — but you'll be competent and capable in both, which is honestly what most riders need.
Budget reality check: A quality all-mountain setup — board, bindings, boots — runs anywhere from $800 to $1,800 depending on brand and spec level. That's a real investment, but it's a fraction of what three purpose-built setups would cost.
When a Second Board Actually Earns Its Keep
There are legitimate cases where a second board moves from luxury to genuine upgrade. Here's when it actually makes sense:
You ride powder more than 20–25 days per season. If you're chasing storms in the Cascades, living in Utah, or making regular trips to Colorado's back bowls, a dedicated powder board changes the experience completely. Wider nose, setback stance, volume-shifted shape — these boards float and surf through deep snow in ways an all-mountain board simply can't replicate. If you're riding pow that often, the investment pays off in pure joy.
You're seriously pursuing park riding. Park-specific boards are built to take abuse. Twin shapes for switch riding, softer flex for buttering and pressing, reinforced bases for rail hits — if you're spending most of your time in the park working on your trick progression, an all-mountain board is holding you back. The right park board makes learning significantly easier.
You're getting into backcountry splitboarding. This is its own ecosystem entirely. A splitboard is a specialized piece of gear that functions as both a snowboard and a set of skis for uphill travel. If you're starting to explore sidecountry or true backcountry terrain, a split setup plus the necessary safety gear (beacon, probe, shovel) is a separate conversation from your resort quiver entirely.
Terrain-by-Terrain Setup Guide
Resort All-Mountain: Go directional twin or directional shape, medium flex (5–7), camber or hybrid camber for edge hold. Size slightly shorter than traditional recommendations if you want a more playful feel. Stance: centered to slightly setback, shoulder-width or just outside. This is your workhorse.
Park and Freestyle: True twin shape, soft to medium flex (3–5), flat or rocker profile for catch-free play. Size down 2–4 cm from your all-mountain board. Stance: centered, wider than all-mountain for stability on landings.
Powder and Freeride: Directional shape with a wider, tapered nose, significant setback stance (2–4 inches back from center), softer overall flex. Size up 3–6 cm from your all-mountain board. This board is designed to be ridden with weight back, surfing through the snow rather than cutting across it.
Backcountry/Splitboard: Match your splitboard specs to your freeride preferences. Add a full beacon/probe/shovel kit and consider an airbag pack if you're riding serious avalanche terrain. Take an avalanche safety course — this is non-negotiable.
Stance Adjustments That Bridge the Gap
Here's a pro tip that saves a lot of riders from buying a second board before they're ready: your stance setup can dramatically change how your single board performs across terrain types.
For powder days on your all-mountain board, move your bindings back 1–2 inches toward the tail and angle your front foot slightly more forward (duck stance toward a more positive angle). This shifts your weight back, helping the nose float. It's not the same as riding a dedicated pow board, but it's surprisingly effective.
For park sessions, center your stance back up and go wider. A wider stance lowers your center of gravity and gives you more stability for landings and presses.
These aren't permanent changes — they take about 10 minutes with a screwdriver. Riders who learn to adjust their setup for conditions are genuinely more versatile than riders who own multiple boards but never tweak anything.
The Real Cost-Benefit Math
Let's put actual numbers on this:
- Single quality all-mountain setup: $1,000–$1,800 complete
- All-mountain + dedicated pow board: $1,800–$3,200
- Full three-board quiver: $2,800–$5,000+
For a rider who gets out 15–25 days per season, a single smart setup is almost always the right call. For a rider who gets out 50+ days and regularly encounters varied conditions — think a local in Tahoe or a season-pass holder at a resort with serious terrain diversity — a two-board setup starts making real sense.
The third board? Be honest with yourself. Most riders who own three boards ride one of them 80% of the time anyway.
Our Honest Recommendation
If you're newer to the sport or riding fewer than 30 days a season: buy one really good all-mountain board and learn to ride it well. Master your stance adjustments. Get your boot fit dialed. The gear you have will outperform your current skill level for longer than you think.
If you're an intermediate to advanced rider logging serious days and chasing specific conditions: a targeted second board — either a pow setup or a park-specific deck — is a legitimate upgrade that will genuinely improve your experience in those environments.
And if someone tries to sell you a three-board quiver before you've maxed out what your current setup can do? Ride hard, ride smart — and ride out of that shop.